WHERE TO BEGIN
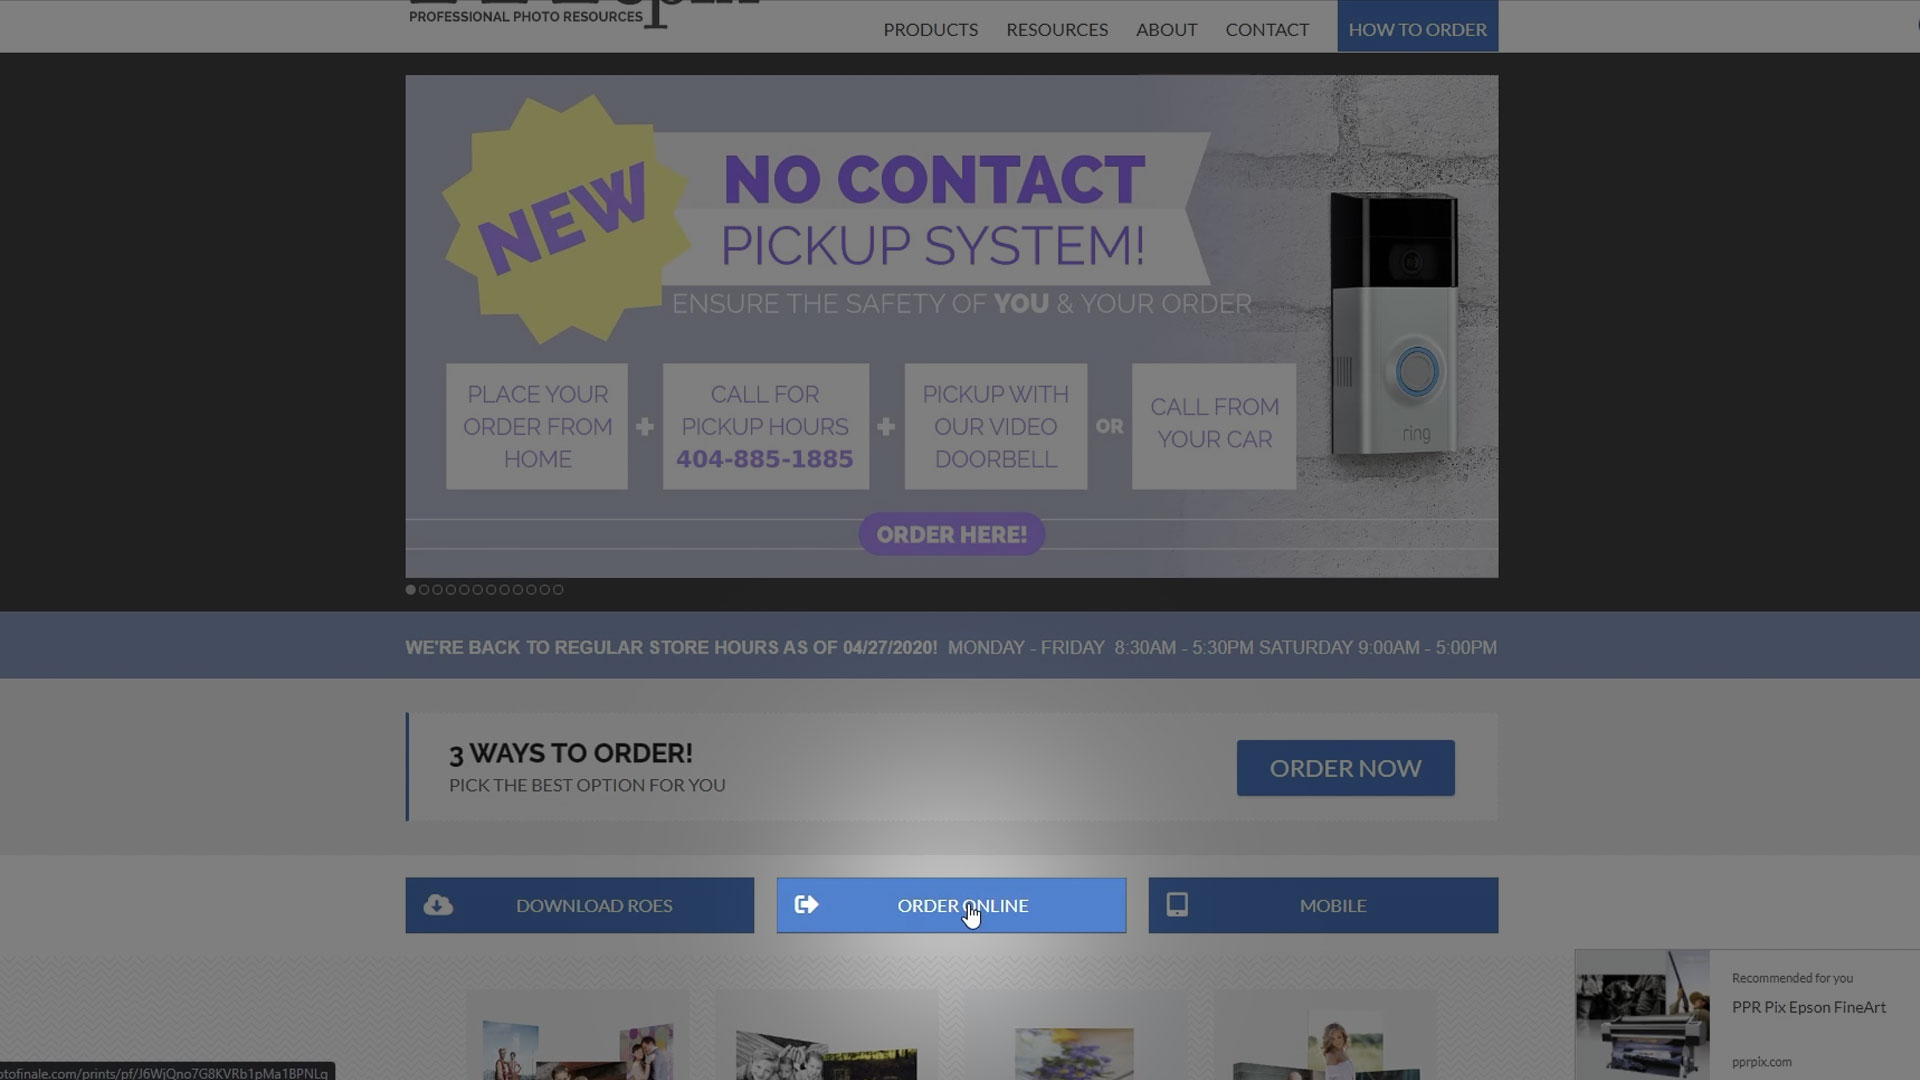
Let's dive right in! First open Google Chrome on your computer (you can use Safari or Firefox but Chrome works best with our portal). Navigate to PPRpix.com and click the blue Order Online button that's just below the slideshow or click here. You will then be redirected to our secure online portal directly to ordering prints.
PRINT MODE OVERVIEW
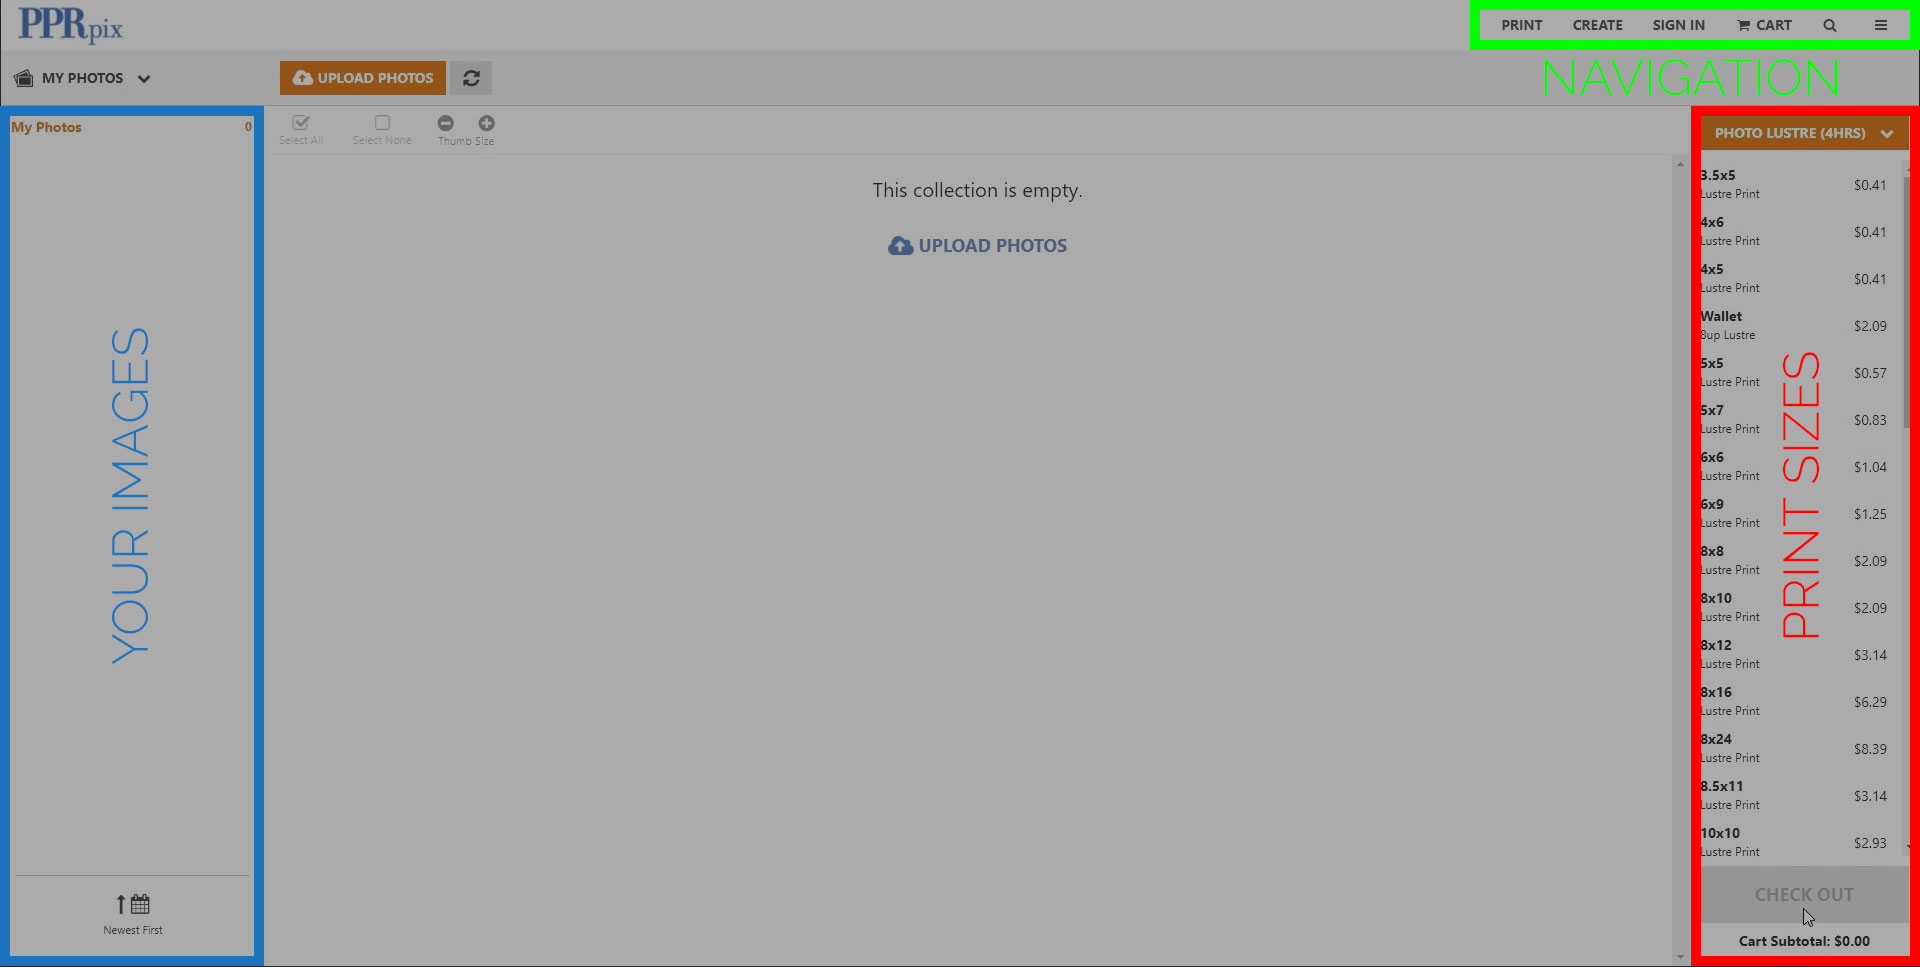
You have main menu navigation at the top right, your photos pane on the left, print sizes on the right, and the center is for selecting and viewing your images. You'll also notice this big green Check Out button at the bottom right corner.
ADDING IMAGES
Next, we'll want to upload the images we want to order. Click the orange "New Collection" button at the bottom left of your screen and give the collection a name and press "Save". Now you can click the orange "Upload Photos" button at the top or the "Upload Photos" in the center of the screen. Next, you are brought to the upload options screen. Always choose "Original Size" to make sure you get the best quality you can. Then click "Add Photos." Navigate to where ever you have your images saved and select the photos you wish to upload. You can select multiple images by holding down Control on PC or Command on Mac. Then press open and you'll see the images being uploaded. Once they are finished uploading you will be brought back to the previous screen ready to order.


ORDERING PRINTS
At the top right of the screen, you see an orange drop down box labeled "PHOTO LUSTRE (4HRS)". Click the drop down box and choose the paper surface you'd like to order.

Select the first image you want to order and you'll see this orange box around the photo. You'll also see this rotate button and expand button to view the image larger. You may also notice that the sizes to the right now have plus and minus buttons next to them. Above the sizes you see an orange Photo Lustre drop down box. Feel free to select which paper surface you'd like from here. Then find the size you want below and press the plus button to sequentially add quantities.
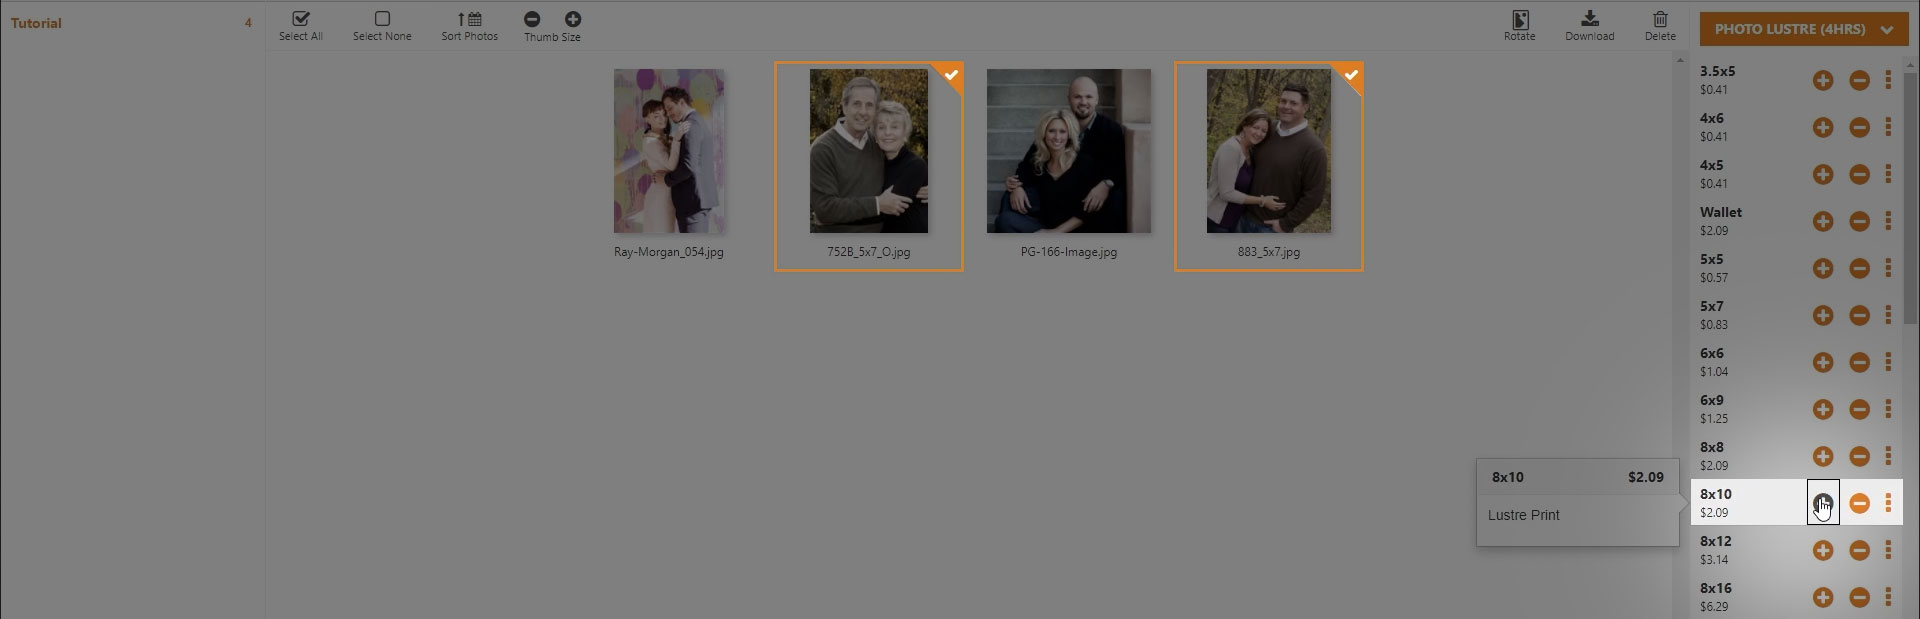
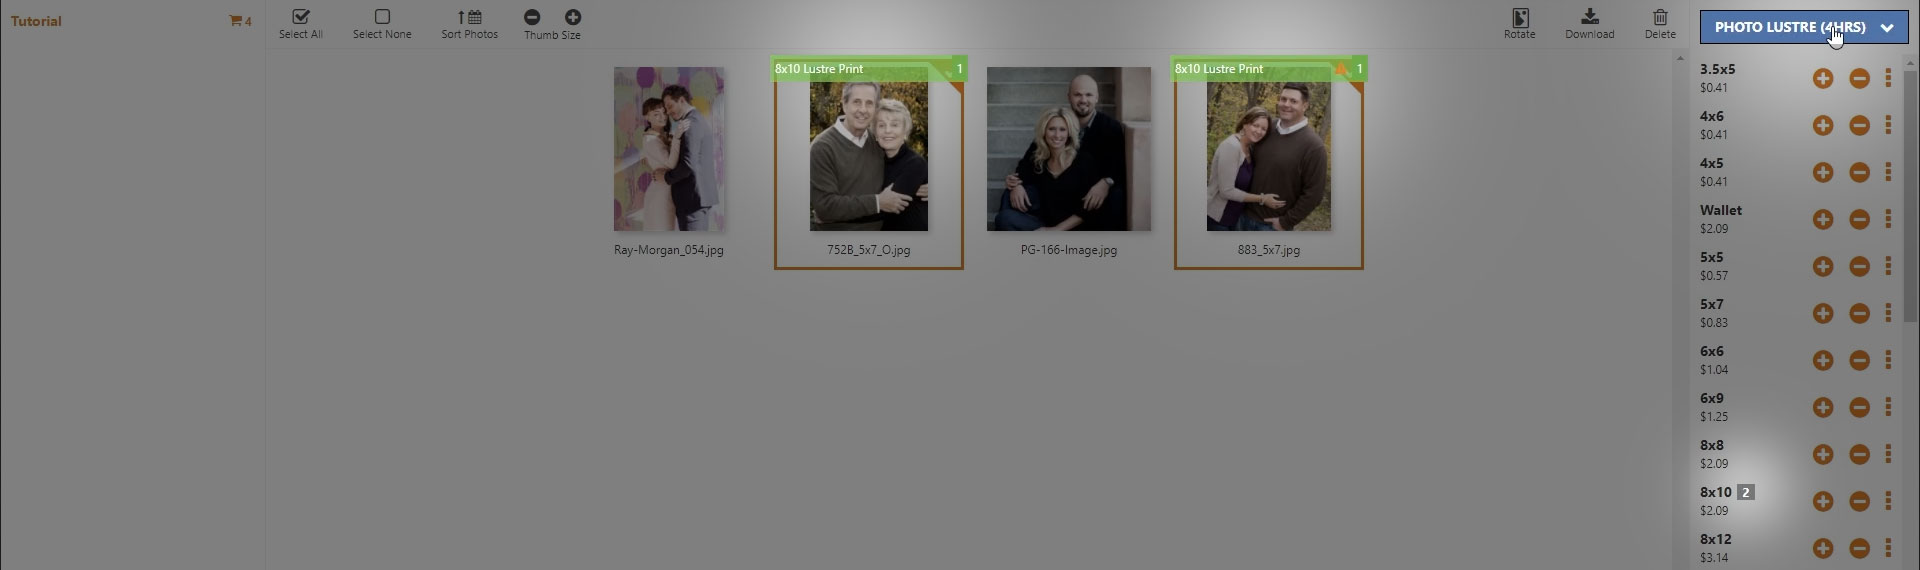
Depending on the size ordered, you may see a pop up window ask you if you want to add mounting options to the order. Select “No Thanks” if you just want a print or select the drop down box and choose the option you'd like and press “Add Upgrade”. Repeat these steps until you are finished ordering.
CHECKING OUT
Once you have everything ordered, click the big green “Check Out” button at the bottom right corner (do not click the cart tab up top).

REVIEW & CROP
You will then be directed to the review and crop screen. Below the title you see 3 drop down boxes. The first two are for filtering what you want to crop and the last is how you want to crop. Usually you won't need to mess with the first 2 because we don't want to skip any needed cropping.
The third drop down has 2 options. The first is cropped and the second is not cropped. Cropping fits the photos short side to the paper and any excess on the long side is cut off. Not Cropping fits the whole image on the paper but has white bars on either the top and bottom or left and right to complete the size you ordered. I'm going to choose to crop my images since that's the most standard and looks the best.
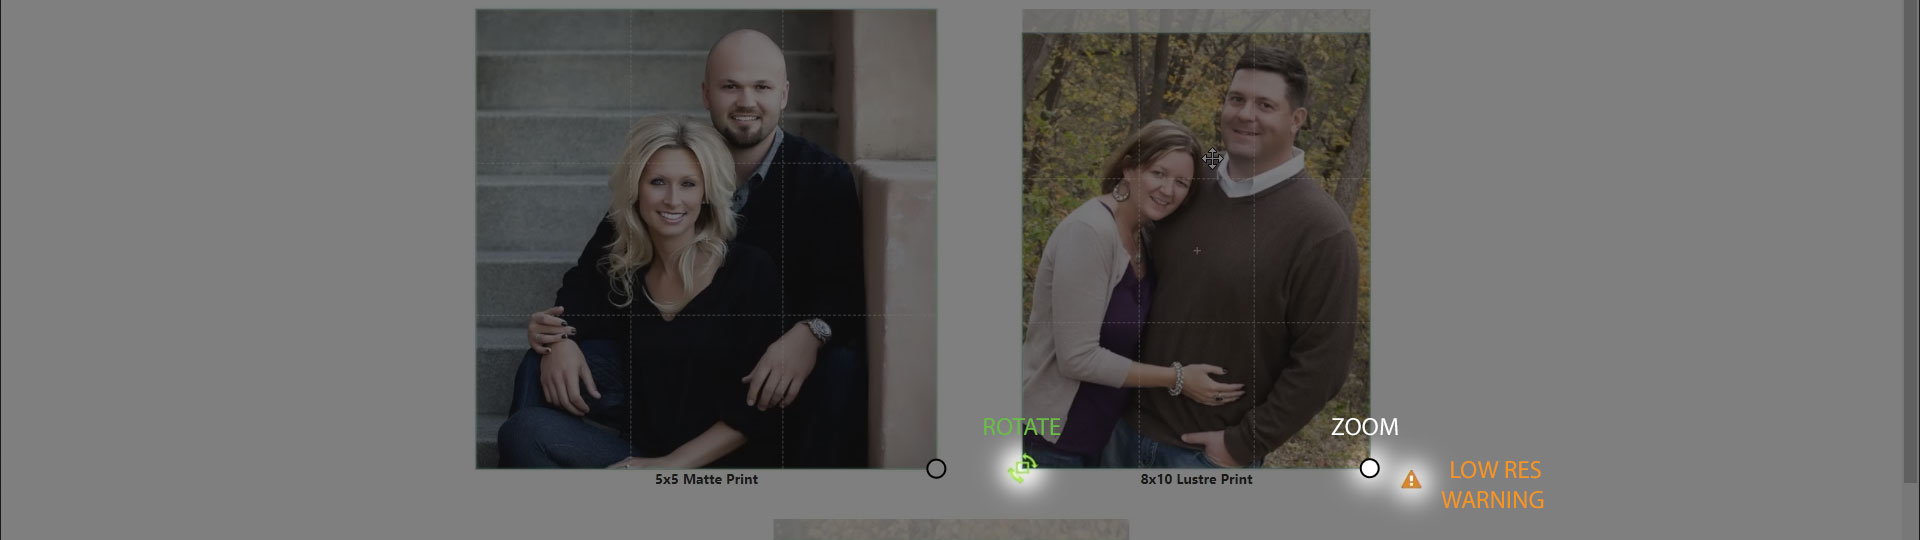
Below that we have the images with these boxes around them. Hover over one of the boxes and you'll see the cursor change to 4 arrows. Once you see the 4 arrows, you can drag the box up/down or left/right to choose what area gets cut off.
You can increase or decrease the size of the images with these plus and minus buttons to give you more accurate cropping.
NOTE: If at any point you see a little red triangle with an exclamation point in the corner of your image, you're cropping too far in or you've order too large of a size for the resolution.
ORDER OPTIONS
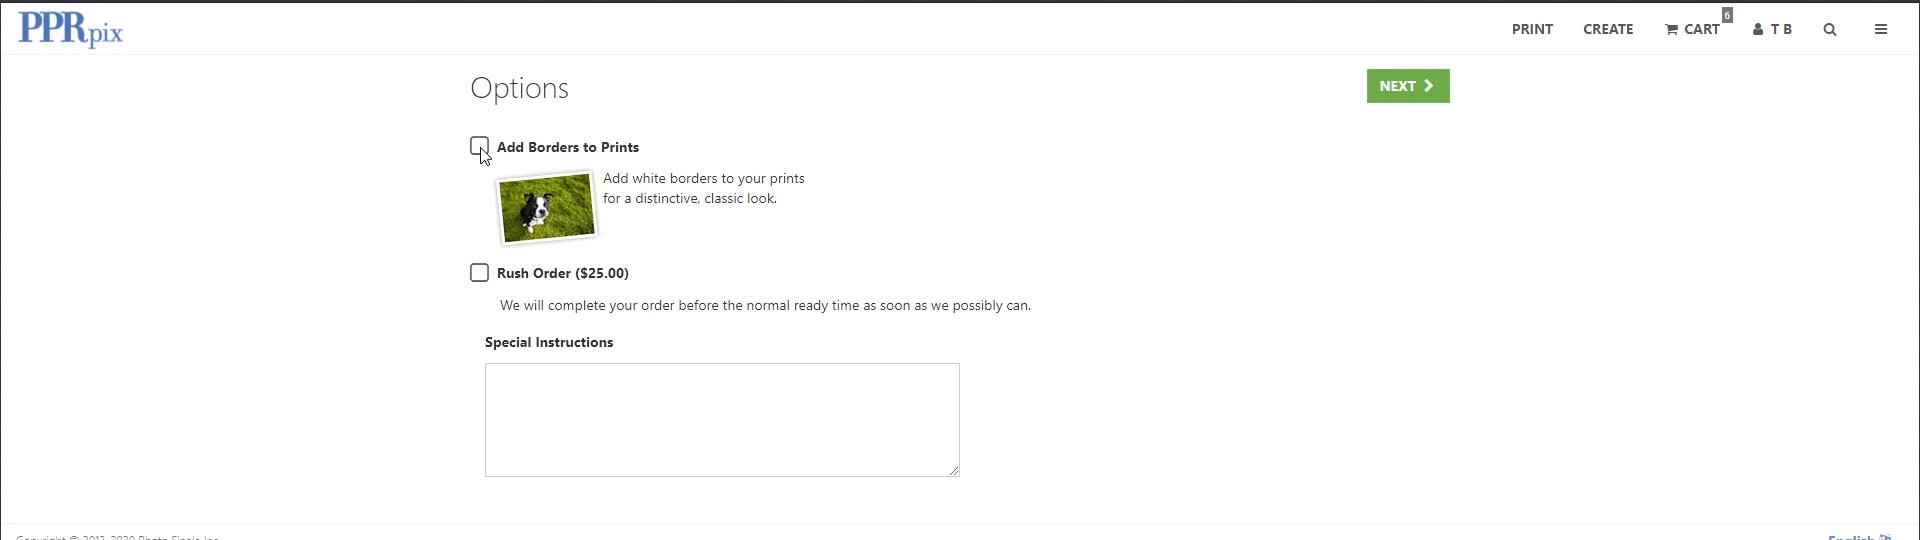
Now we have some order options we can pick from. Adding Borders will add roughly a quarter inch inside border on all small prints and 1/2 inside border on all large prints. Unfortunately you can't mix non-bordered prints with bordered prints in an order. You would need to place separate orders for that.
Check the box for Rush if you are in a hurry and need the order before the listed ready time. Below Rush is Special Instructions which you can specify any concerns or messages to the lab. Once you’re done, click Next and you'll be taken to the Order Summary page with the balance due. Click next when you're ready.
REVIEW
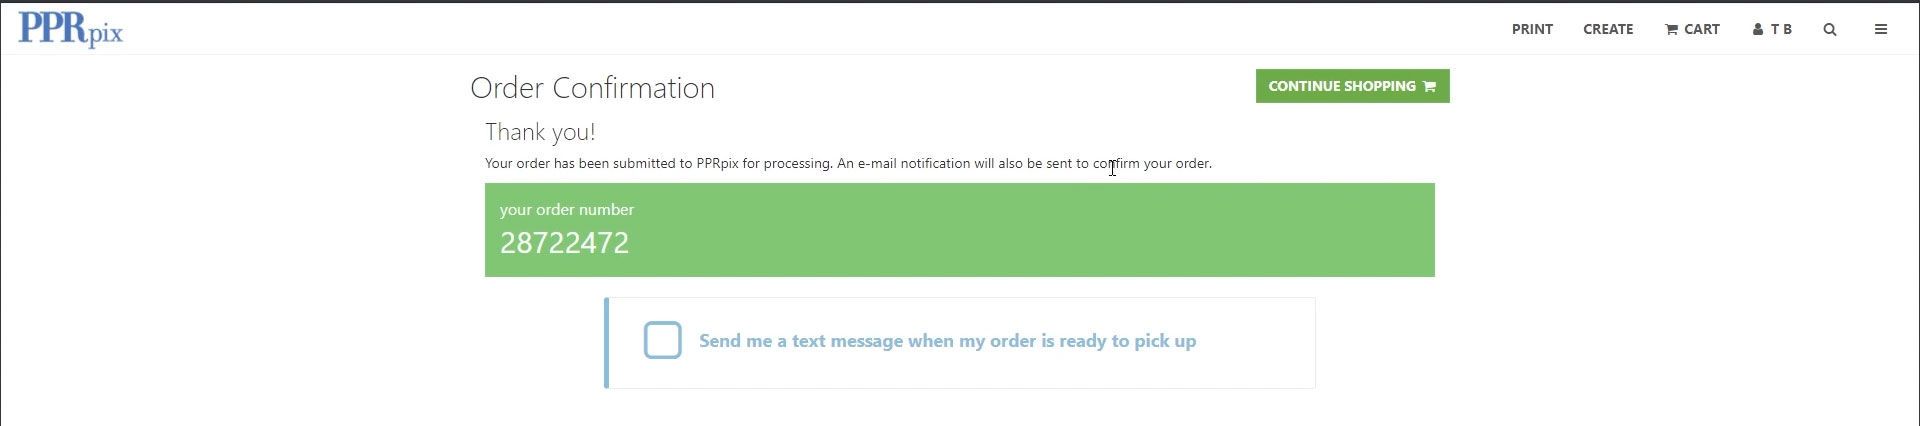
Here's the final review of everything we picked for our order. Make sure everything looks good and click the Orange Place Order button to finish. That's it guys! You've successfully placed an order. You can check the box here to receive text alerts for the order so you know when it's ready. You'll also receive an email with the order info if needed.