INTRODUCTION
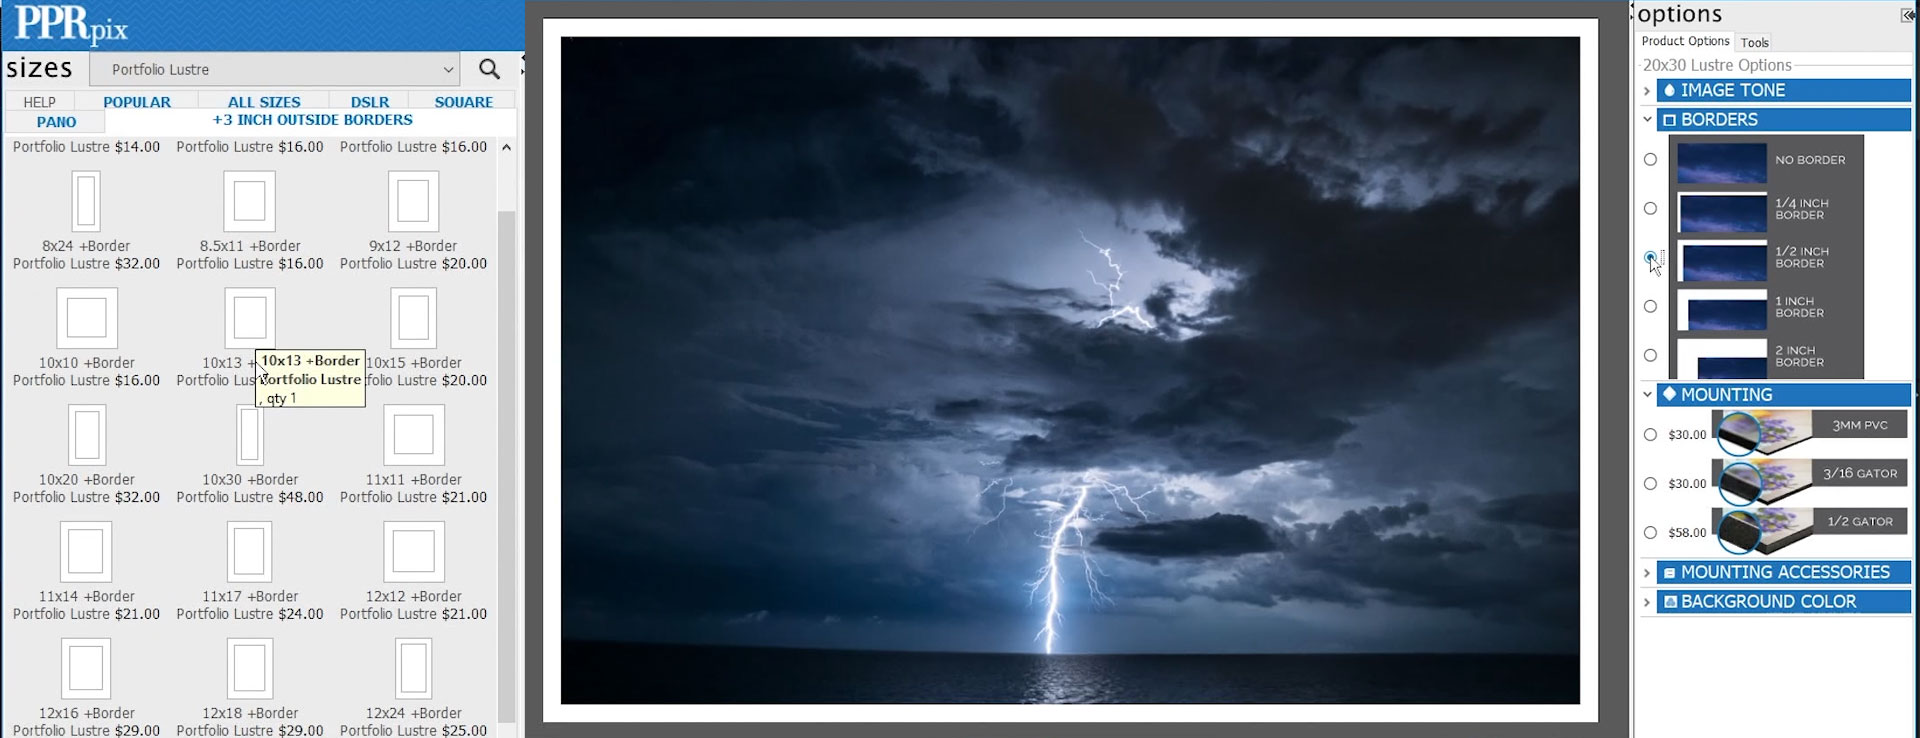
In this tutorial I’m going to show you how to make a 2 inch outside border on a 20x30 image using Photoshop CC. In our PPRpix ROES software, we have 3 inch outside borders for the fine art papers. All the other papers have inside borders.
OUTSIDE BORDERS
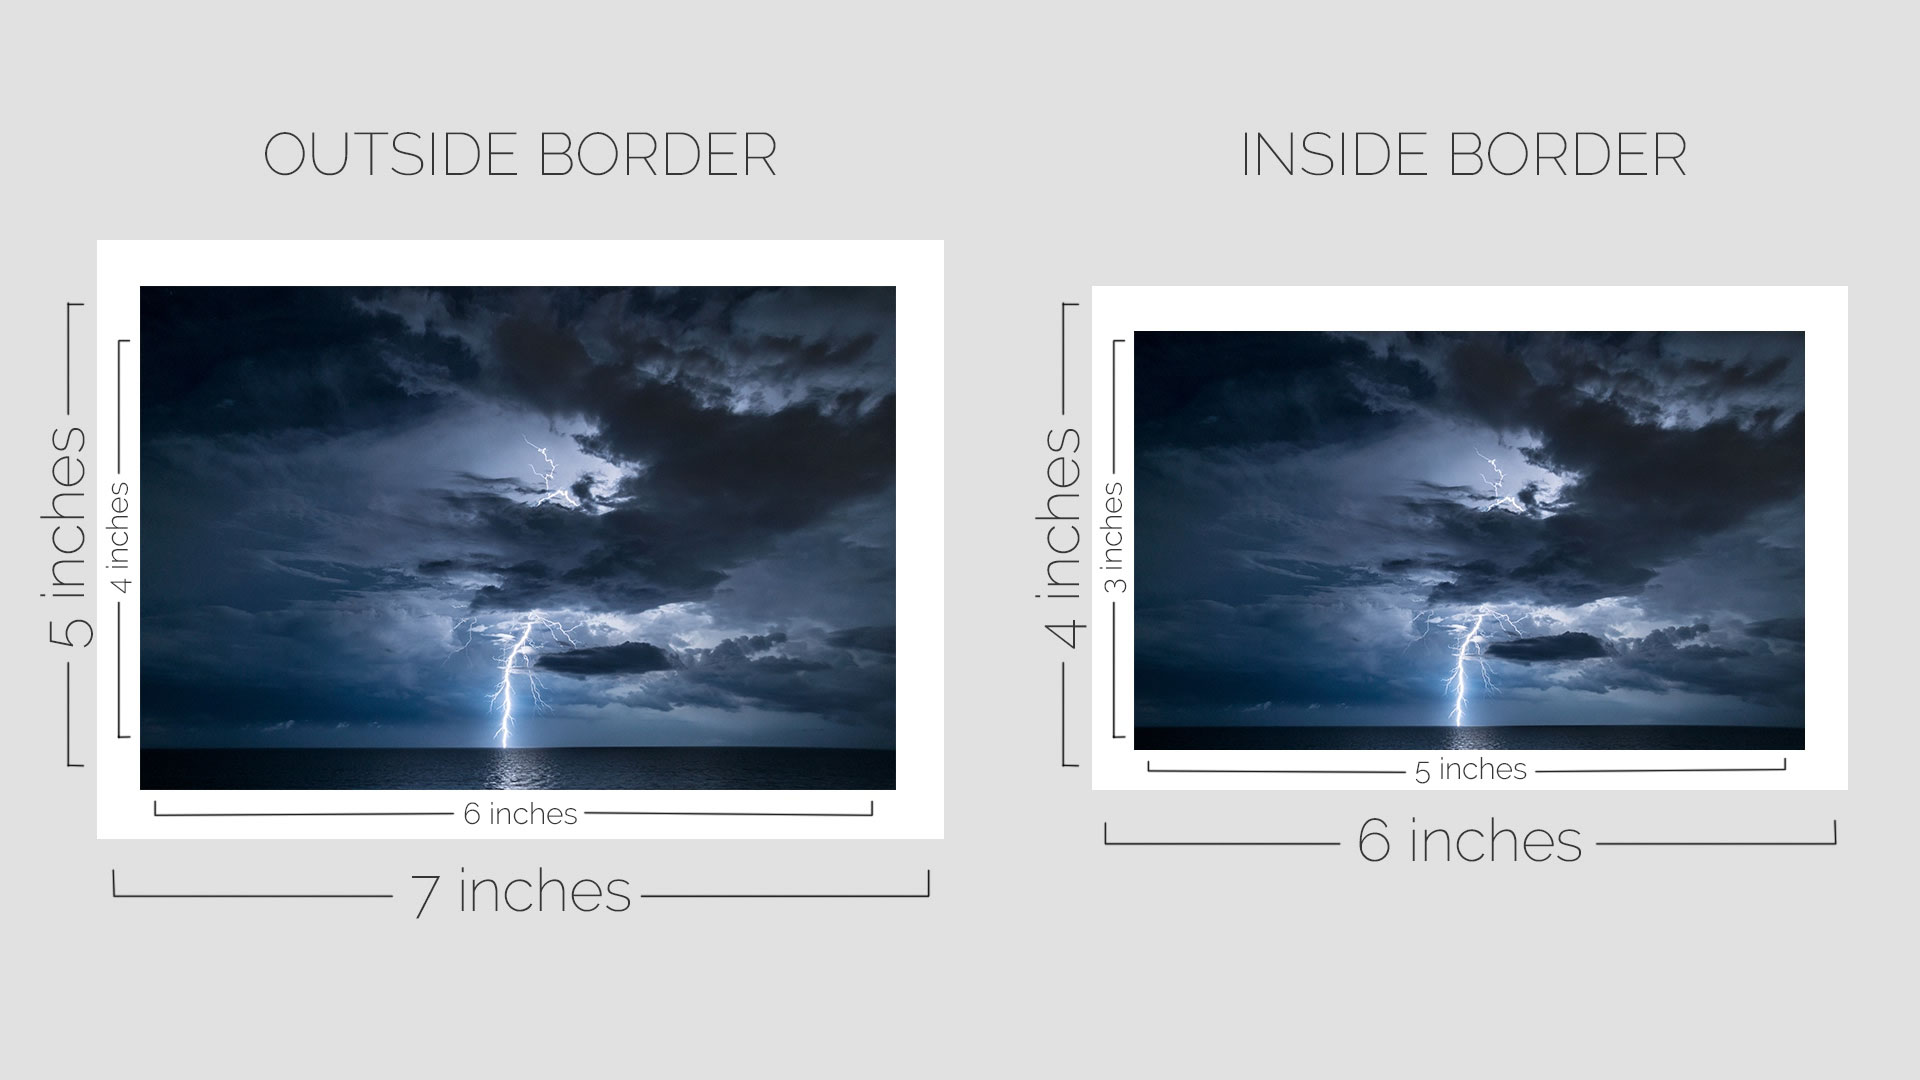
The opposite is true for outside borders. The image itself is 4x6 while the paper is a little larger. Say we have a 4x6 print with a ½ inch outside border. The piece of paper would be 5x7 to fit the extra ½ inch border all the way around.
ADDING OUTSIDE BORDER
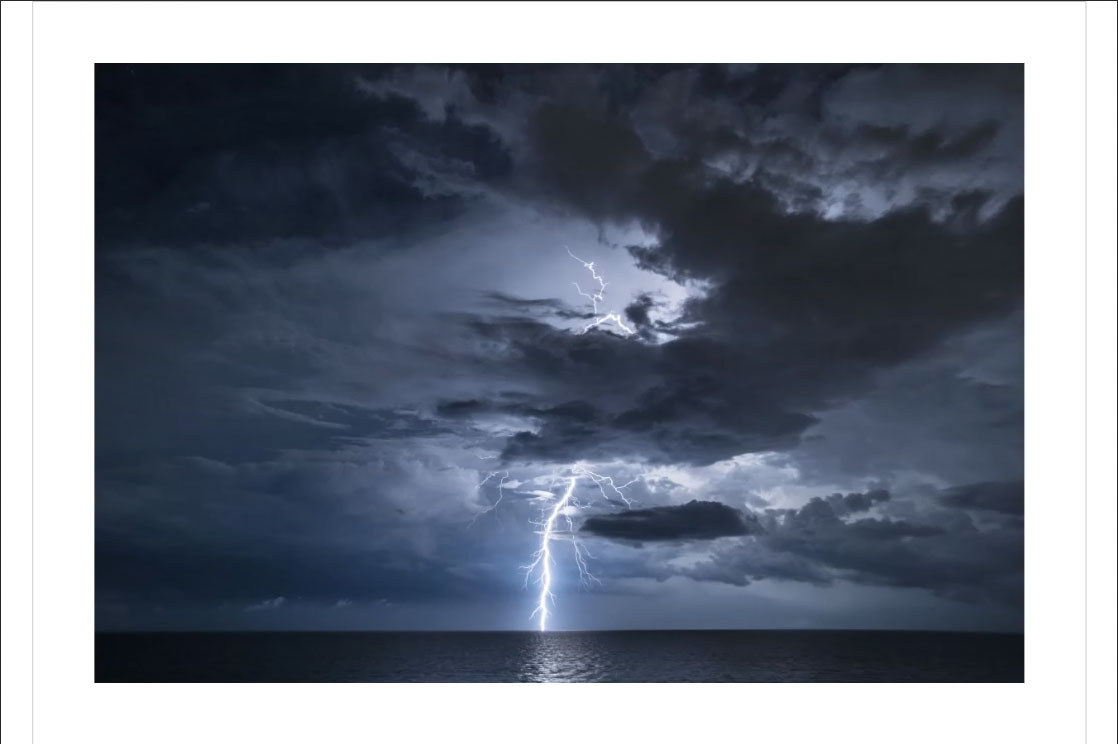
For this exercise, I’m going to add a 2 inch outside border to this 20x30 image.
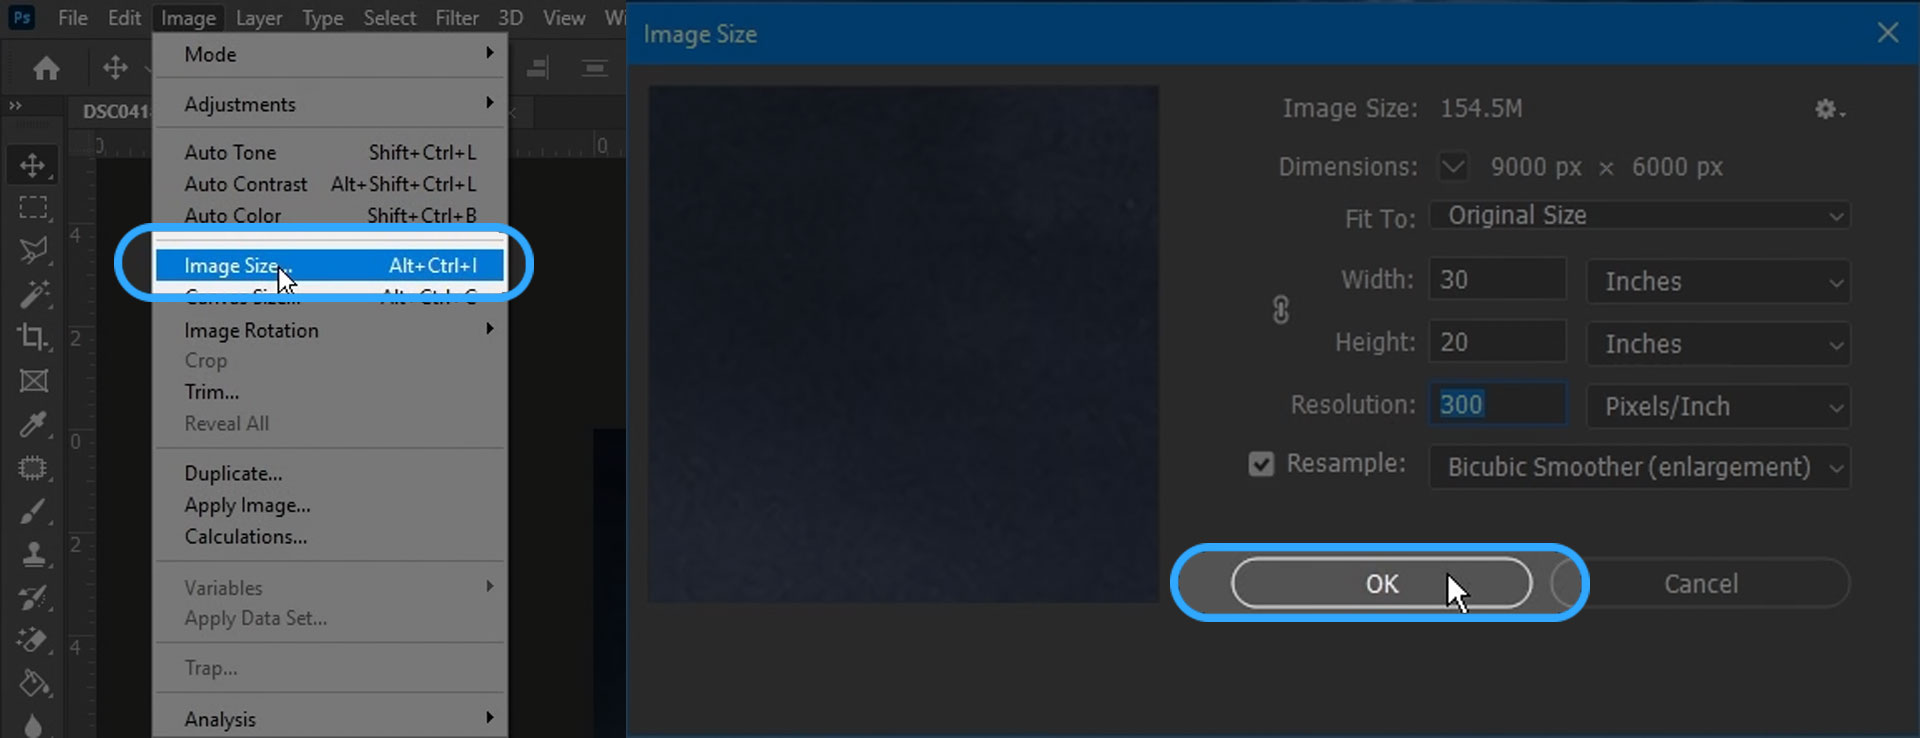
1 • First, we will go to “Image>Image Size” and make sure your image is sized to the size you want to print. Make sure the image DPI is set to 300 and press “OK”.
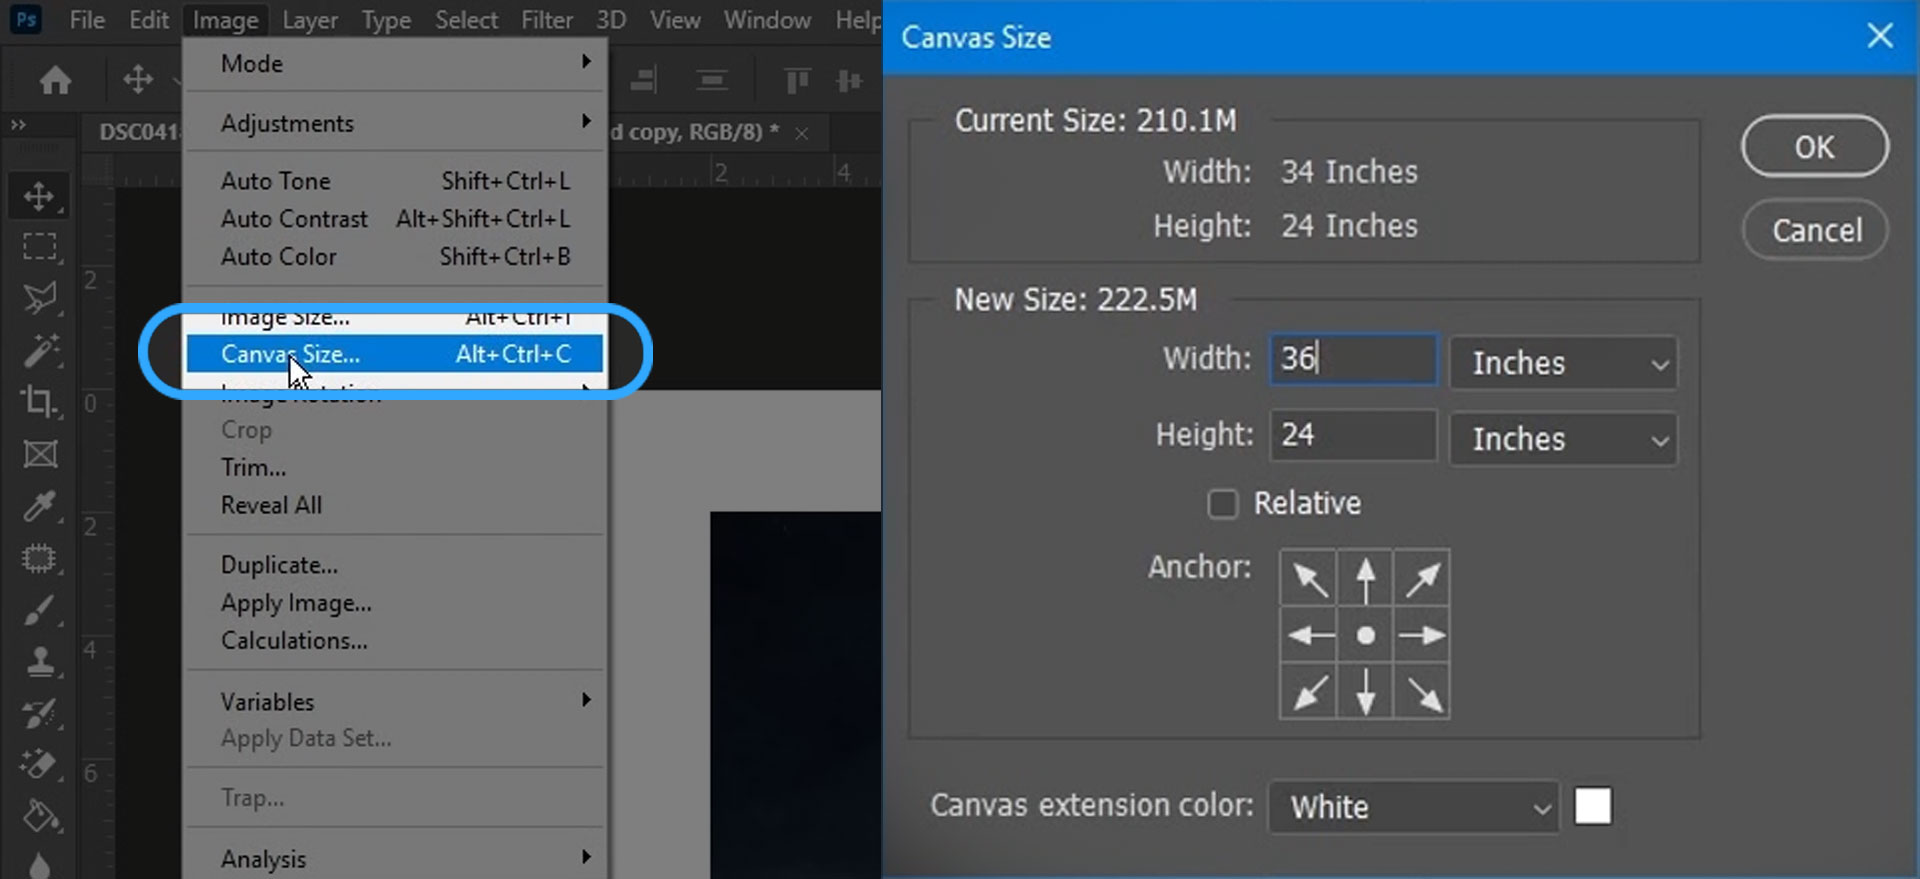
2 • Then go to “Image>Canvas Size” and increase your canvas to add your desired border width.
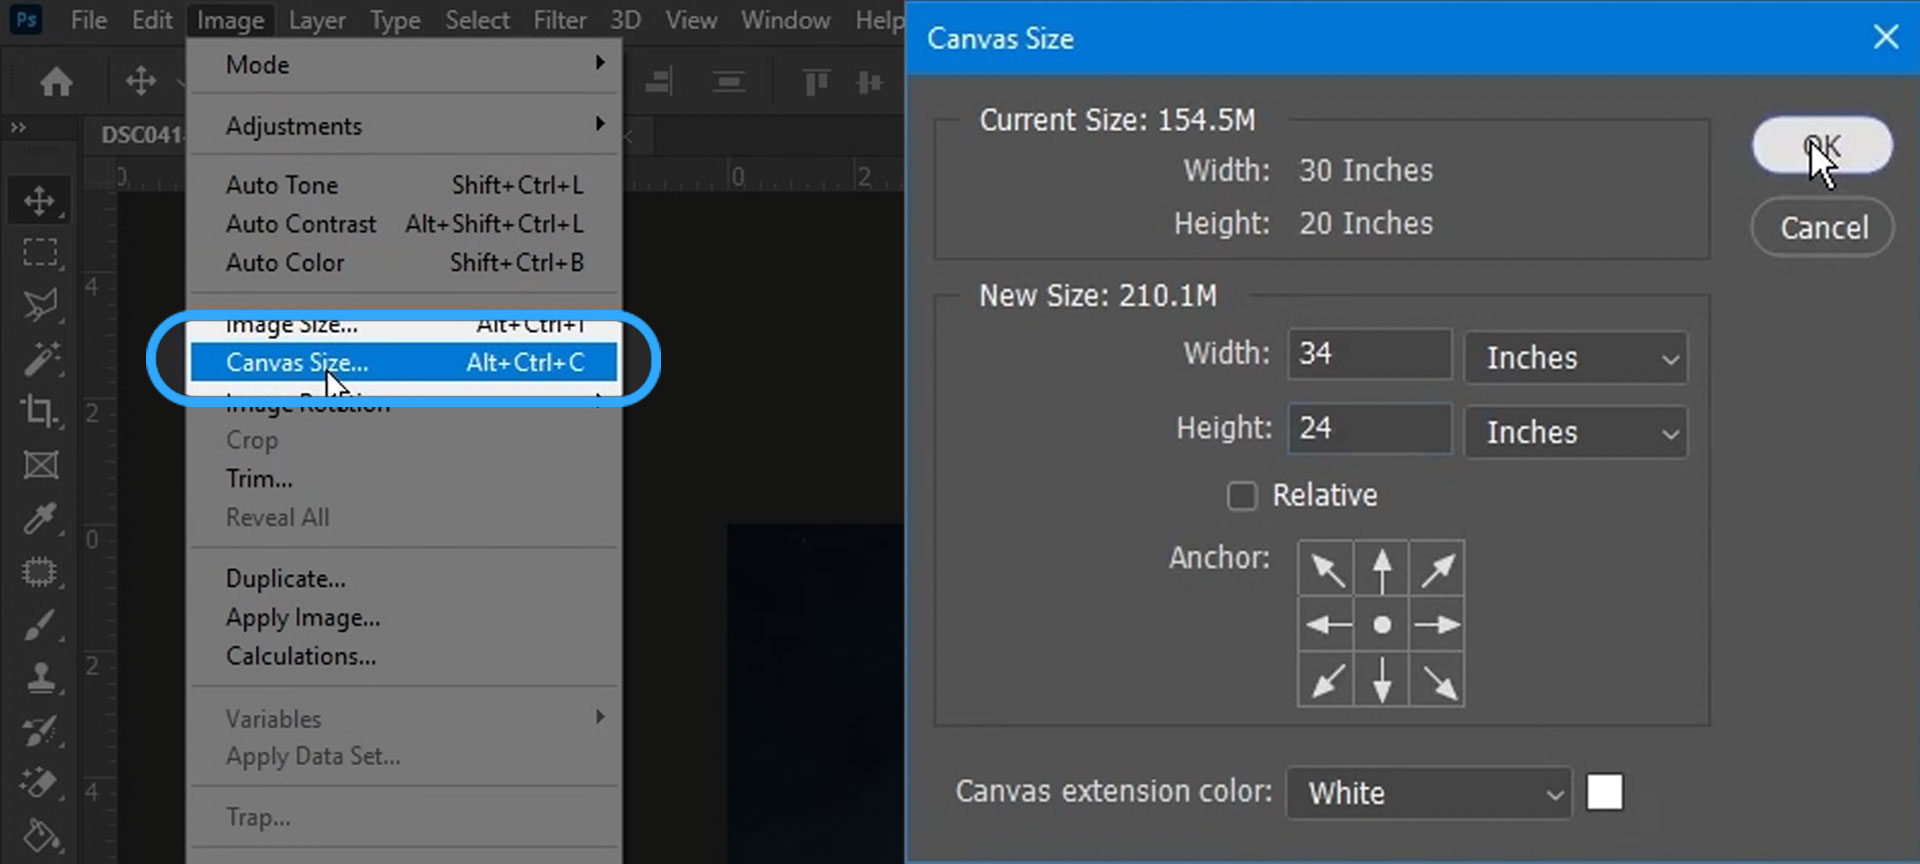
Quick Math: Take the border thickness you’d like, times it by 2, then add that number to the width of the image to get the canvas width. Do the same for the height, and you’ll have your paper dimensions. (Ex: 2x2=4 ; 4+20=24 ; 4+30=34 ; 24x34 paper).
Now that we have the paper sized correctly, we notice that it’s no longer a standard size. So we will have to set it up like a custom size on a standard size and have the extra white trimmed off. Since the example’s paper size is now 24x34, we’ll set it up on a 24x36 standard size.
3 • Right click on the background layer and select “Duplicate Layer” or drag the Background layer over the plus sign at the bottom of the layers pane.

4 • Double click the empty portion of the new layer to open the Layer Styles (circled in picture above). Check the box for “Stroke”, Structure Size set to 2px, Position on the “Inside”, set the Color to black and press “OK”.
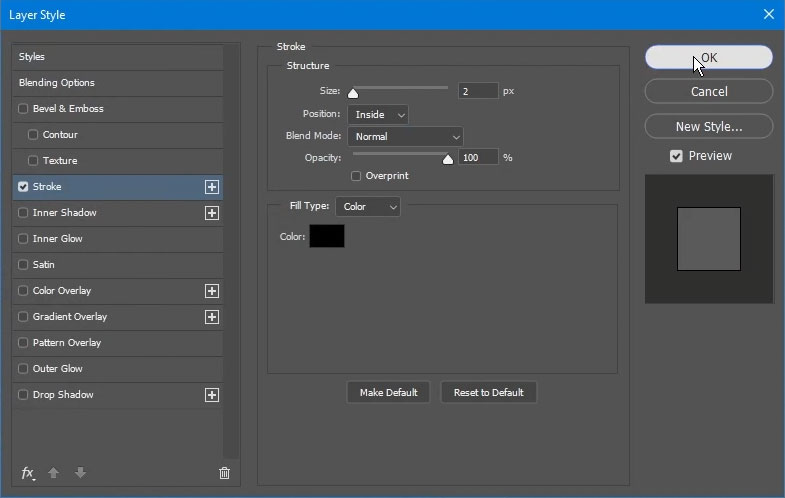
You won’t see much change at the moment but after the next step you will.
5 • Go to “Images>Canvas Size” and change the dimensions to 24x36 or whichever standard size you chose.
Now you should see the stroke along at least 2 edges.
6 • Then go to “File>Save As”, choose the file type as “jpeg”, name the file, make sure ICC Profile is checked, and choose “Baseline (Standard)” in the options popup window.